It’s negative four degrees outside. …The traveling company just formed a union and are now on strike! They want to renegoiate their contract. Something to do with working conditions and sub zero temperatures. I think we’ll start a little later than usual….Let the hired help settle down a bit. I kind of agree with them though. Hobbits definitely don’t work when it’s this cold out.
Well you never really know what’s in store for you during the winter months so you always are thinking of ways to prepare for the worst and trying to take advantage of the few good days you have when you get them.
Just real quick before I get started. I went to see “The Hobbit: The Desolation of Smaug” again Friday night with my wife. We had a snow storm Thursday night into Friday morning so we had a short day at work in Queens. These weather men are ridiculous at times. This quote unquote super storm was supposed to drop 10 to 12 inches on us overnight. I woke up Friday morning at 3;30 to plow my driveway and I barely had 6 inches of snow. They scared everyone from going into work, as well. The roads weren’t really that bad either. I drove to work in my Toyota Corolla there was hardly a car in sight. As they say in Queens….Don’t worry aboooouuuutt it! (The Corolla is unbelieveable in snow.)
Sorry about going off on that tangent there. Getting back to the movie. We saw it in the I-max theatre in 3-D. I have to say I really liked it the second time around much better than the first time I saw it. So did my wife by the way. I can always tell if my wife likes or dislikes a movie by the whispered commenting I start to get during the course of a film. First time around I believe the commenting went along the “I’m bored” vein. And there was a lot of angry sighing. This time nothing. When the movie finished she looks at me and says, “I really liked it!” ….and I had to agree with her. The I-max theatre was pretty cool. I would definitely recommend seeing it there. I think for me personally I initially had certain expectations of the movie when I first went to see it and also had a preconceived notion of how the movie should proceed. When it didn’t go in that direction I was disappointed. I was definitely able to relax and take it all in better the second time around. Not that it was perfect but I will definitely be buying the extended version when it comes out.
So back to our little project called Hobbit Hollow shall we?….
New years eve is a half day for us at work so I was able to get up to the house around 1 o’clock and get some work done. I met Ethan and Egzon up there as well and they continued nailing the decking for the roof. I was going to help them but there are some technical things that I wanted to cut out that only I could do so I focused on that for the afternoon. The stuff I was working on has to do with the continuation of the roof decking at the four corners of the house. We’ll get to that I’m hoping next weekend weather permitting. I had trouble figuring out how I’m going to frame this but I came up with a couple of ideas while driving to work one day and it will be interesting to see if my ideas work. We’ll definitely need a visual to explain this one. Anyway here are Ethan and Egzon installing the roof deck.
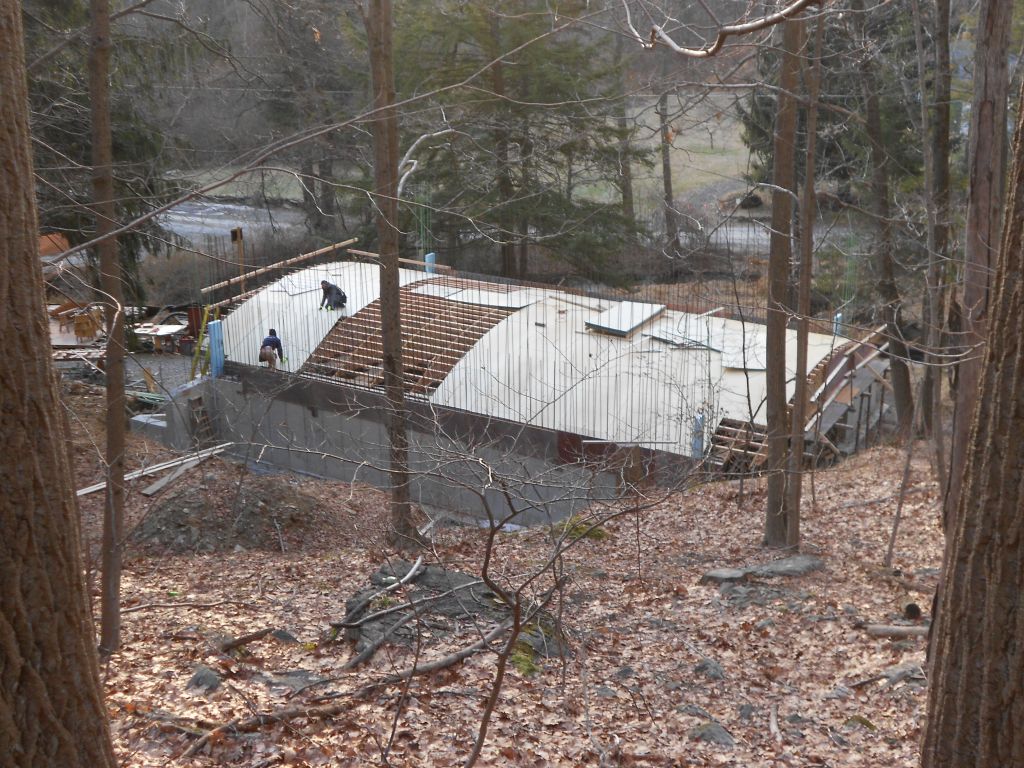
Boy, oh boy are we getting close or what?
Of course along comes the super storm Thursday night into Friday with its sub zero temperatures to put a wrench into our gears for Saturday. It really was negative four outside Saturday morning so I was definitely not so into getting an early start. I negotiated with the Hobbit union and they agreed to do snow removal for me. It was about an hours work. Dangerous work none the less, especially when you are on a curved roof that is sheathed with plastic plywood. They got it done though and in record time I might add. Here they are: The three stooges…Larry, Moe, and Curly.
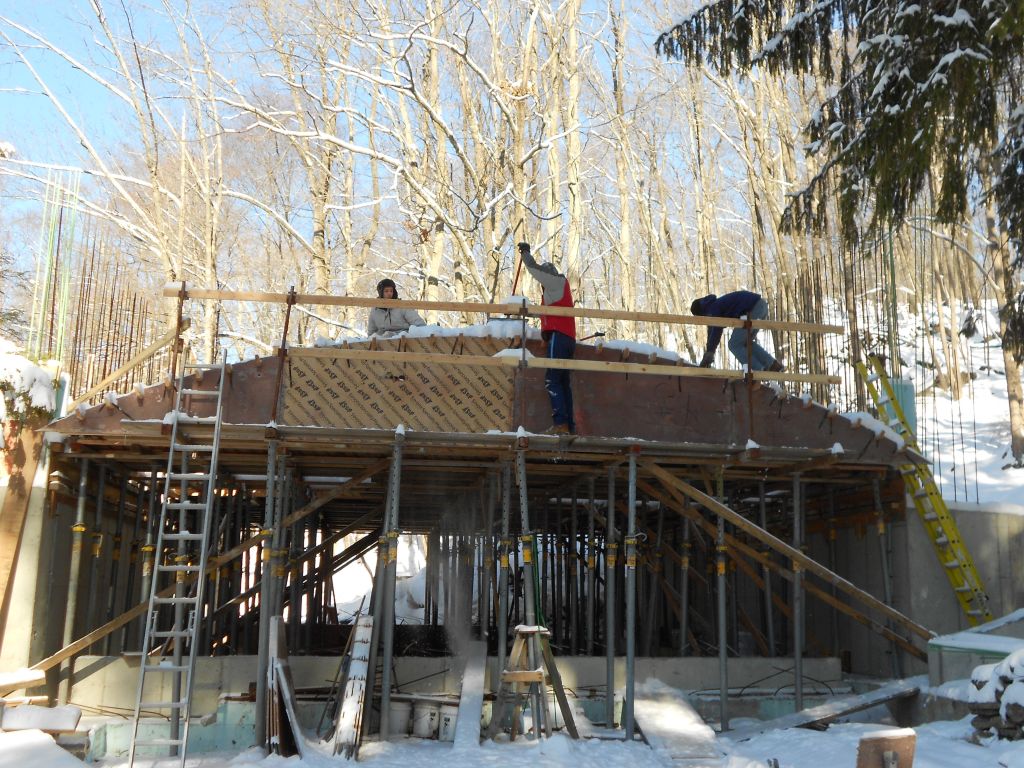
It was a picture perfect day out. It did warm up into the mid 20’s after lunch so it wasn’t that bad working that afternoon.
I decided to cut the templates for the spandrel sides after lunch. The spandrel is the form that defines the slab edge for the roof. This is not that simple to explain but in addition to being the slab edge form it also has the detail blocks that Terence and Julia started working on last weekend. This spandrel detail is going to be almost exactly the same as the spandrel I did for the Hobbit shed. Which can be seen on the home page of the website. So there is some extensive layout work that has to be transferred onto the template. This is time consuming and important if everything is to look proportional and logical if you will.
I had already done an extensive layout of the spandrel and the retaining wall curb above it on my layout deck. Unfortunately most of what I had done had faded or gotten partially erased during the course of working on that deck. So the first order of business was to freshen up the original layout I did for the detail blocks. I know it’s a long ways off but this is going to look so cool when it’s done. It’s very hard to visualize what is going to happen while it’s on the deck though.
So this is the way we build a spandrel side for a Hobbit house: Pay attention here because this is where you can learn something. I cut 24 inch HDO plywood and laid it out directly over the spandrel layout I had on the deck. I overlapped the pieces so the joinery of the spandrel would be consistent. Here’s a picture of step one.
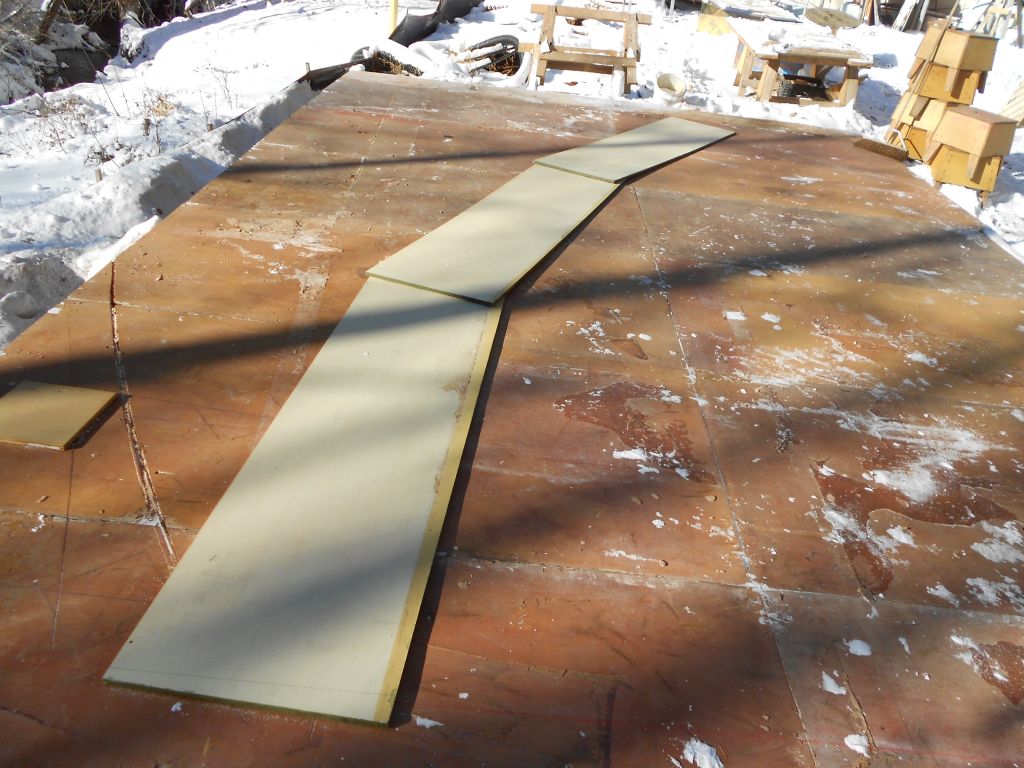
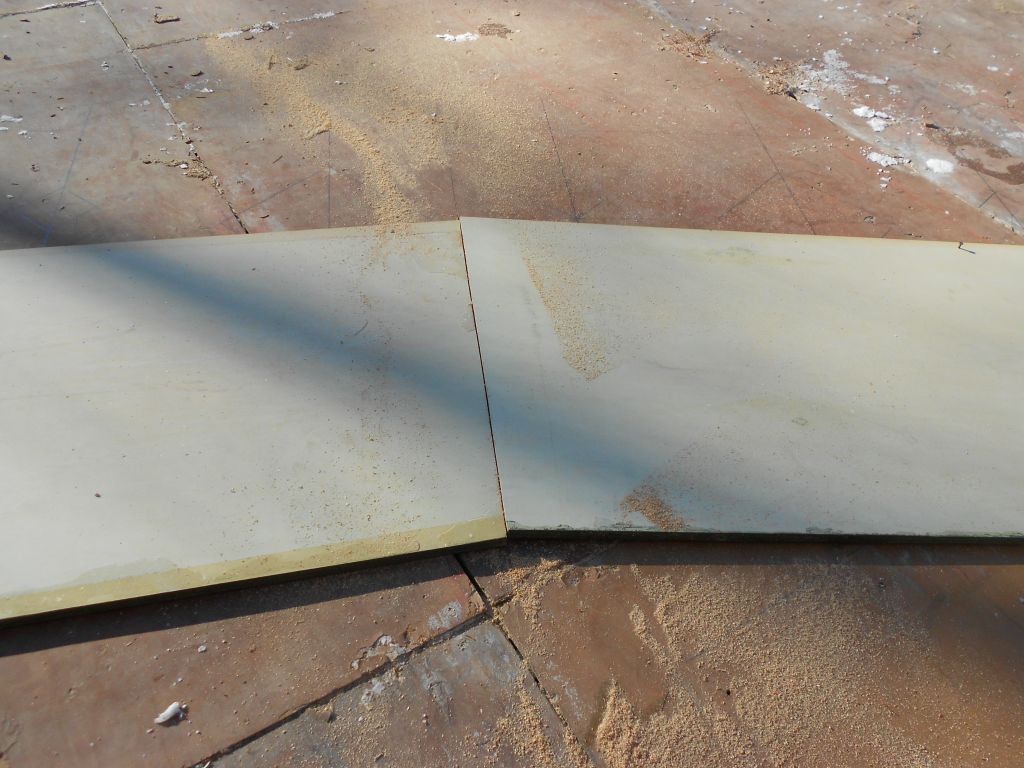
The next step is to cut through the plywood at the joints. The cut has to be made through a line that starts at the center of the circle that forms the shell of the Hobbit house itself. All the details of the spandrel are laid out through this centerpoint. This was actually part of my initial layout so once I freshened up the layout details on the deck it was easy to establish where I should cut the plywood. By overlapping the plywood and cutting both pieces simultaneously you get a perfect fit. Here’s what it looks like after the cut is finished.
I think my editor is going to have trouble understanding what is going on here but I must press on. Hopefully I’m not losing too many of you here.
So once this joint is cut all we have to do is scribe the radius of the Hobbit roof onto this plywood and cut it out. Take your time though you definitely don’t want to mess this up. Underside of slab is radius 34′-0″ top of slab is 34′-9″.

So this is the template for the spandrel side. Half of one side anyway. The next step is to mark out where the detail blocks go and the associated trim work. I didn’t take a picture of that but now we are ready to finish cutting up and marking the balance of the spandrels. Be careful one more template will be cut exactly the same as the one shown and two will be cut as a mirror image of this for the other half! (Editors note: Wow! That was very confusing!)
Like I said before with weather permitting we should be able to finish the decking and start installing the spandrels next weekend.
Wild card weekend: Did you see that Indianapolis v. Kansas City game? Wow! Terence left at half time saying: “There’s no way Indianapolis can win.” I think they were down 38-10 at one point…what a comeback.
And we’ll be back too! There and back again.
Take it easy!
Jim